


Written by: Annie S.
Welcome back to the second part of our D&D Maps: Boss Lairs and How to Use Them series! (Read Part 1!) This time, we’ll be visiting the lairs of some truly sinister and powerful foes: twisted hags preparing for dark rituals, the mind-boggling chambers of an elder-brain, and even the forgotten prison of an ancient god.
In addition to stunning map recommendations that will set the perfect scene for your final showdown, we’ll also be suggesting unique mechanics, environmental hazards, and other twists to spice up your boss encounters. So, without further ado, let’s get to exploring the boss lairs where legends are made, and villains meet their final fate!
6. Annis Hag Lair
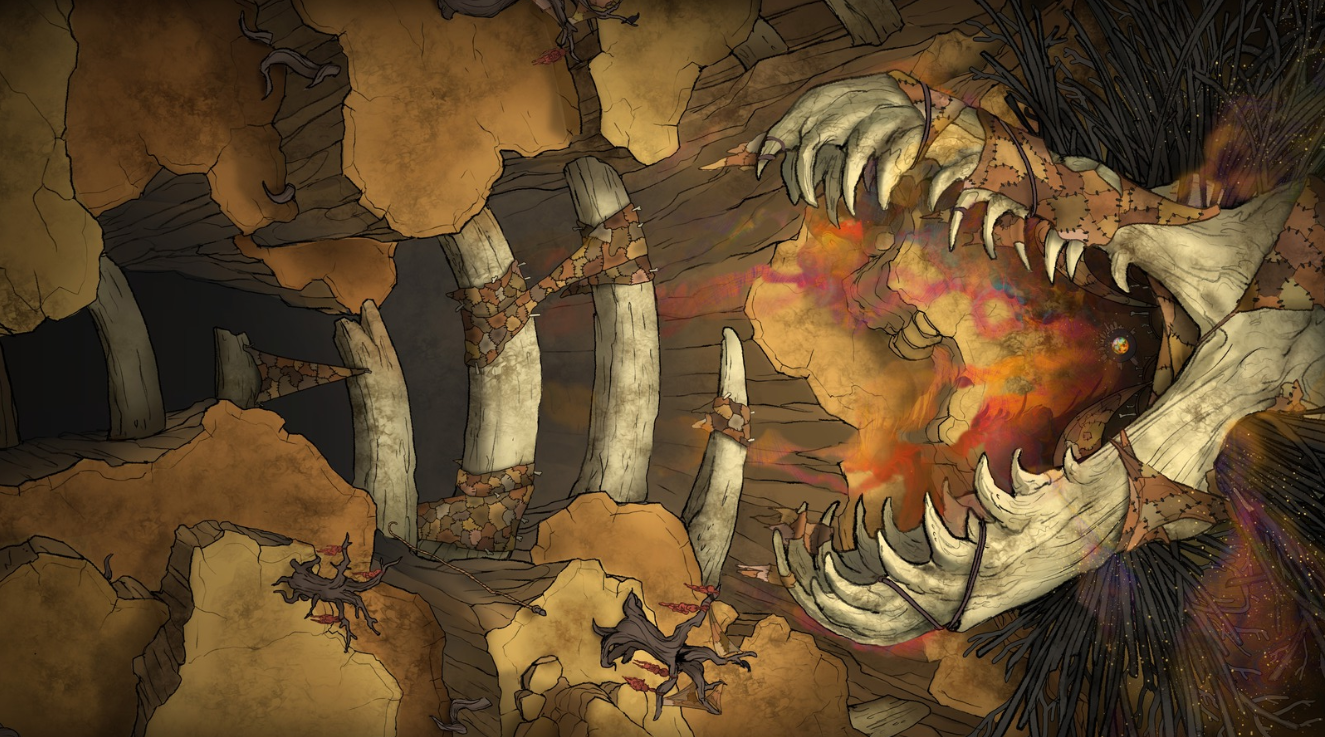
Kicking off this new list is the eerie, bone-chilling Annis Hag Lair map—a truly terrifying stage for an encounter with one of D&D’s most gruesome and twisted fey creatures.
A sprawling lair lies nestled within the colossal, skeletal maw of a long-dead, gargantuan beast. Jagged craggy cliffs surround the skull, decorated with gruesome remnants—tattered rags, gristly remains hanging from twisted trees, and canvases made from a patchwork of skin. The cliffs themselves also form an intense sense of verticality, giving your players a chance to make use of the twisted terrain for cover and strategy during their fight.
Suggested Mechanics
- Gruesome Remains. The Annis Hag can reanimate the grotesque corpses hanging from the trees. In addition to the hag’s usual cadre of monsters, these corpses may act as distractions and shock troops. True to the Annis Hag’s penchant for gristly experimentation, these remains may even be rigged to explode upon defeat.
- Echoing Screams. The Annis Hag uses the environment to amplify her voice, allowing her to project terrifying, disorienting screams through the ravine. Players who fail a saving throw against the unsettling noise might become deafened, suffer psychic damage, or even lose concentration on a spell.
- Gaping Maw. Given the Annis Hag’s tendencies of biological experimentation, it’s no surprise that the skeletal maw forming the lair’s entrance is more than a dramatic backdrop. The hag has imbued the bones with dark magic, allowing her to control them—serving as a brutal trap, or strategic obstacle to cut off escape routes or isolate party members from one another.
7. Elder Brain Lair
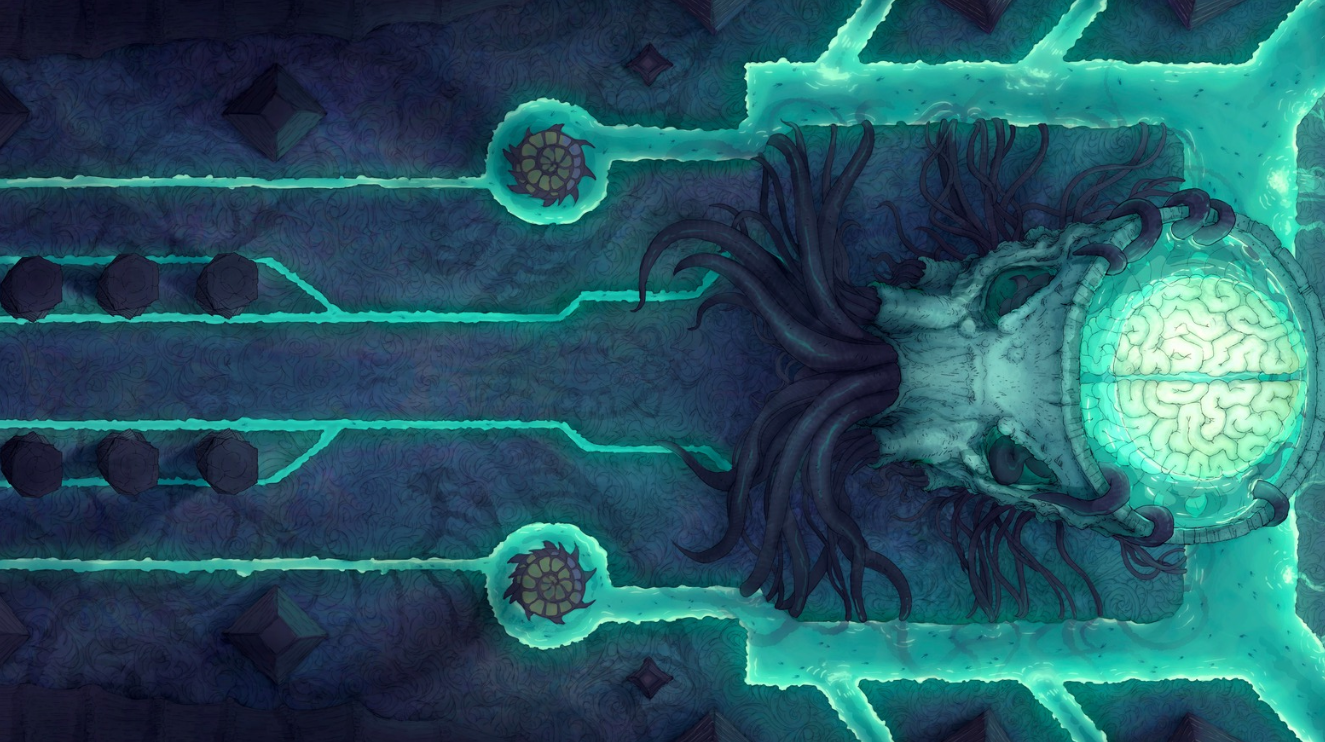
Deep in the abyssal depths of the Underdark, mind-bending horrors await your players in the sinister confines of this Elder Brain Lair map.
Suggested Mechanics
- Neural Feedback. Between the tubes, veins, and ectoplasmic channels, the lair is intrinsically tied to the Elder Brain’s well-being. Each time the brain is damaged, the feedback from the damage sends shockwaves through the lair’s psychic network. Players must succeed on a saving throw or be affected by a mental condition such as confusion or perhaps a temporary madness effect.
- Mental Probe. The Elder Brain can delve into the minds of the parties, uncovering their deep fears and weaknesses, and gaining insight into their vulnerabilities. It can exploit this knowledge to taunt or even dominate a player, forcing them to act against their allies until they succeed on a saving throw.
- Visions of the Past. With its psychic powers, the Elder Brain creates vivid and horrifying illusions tailored to the characters’ psyche—forcing them to confront faces of loved ones they’ve lost or enemies they have defeated. This can lead to poignant roleplay moments but may also cause mechanical conditions such as paralysis or psychic damage.
- This can be especially potent when used in an Out of the Abyss campaign, where an Elder Brain has fallen under the influence of Orcus, the Demon Lord of Undeath. Will your characters be able to cut down the long-dead faces of their grief and regret?
8. Lair of the Many Eyed God
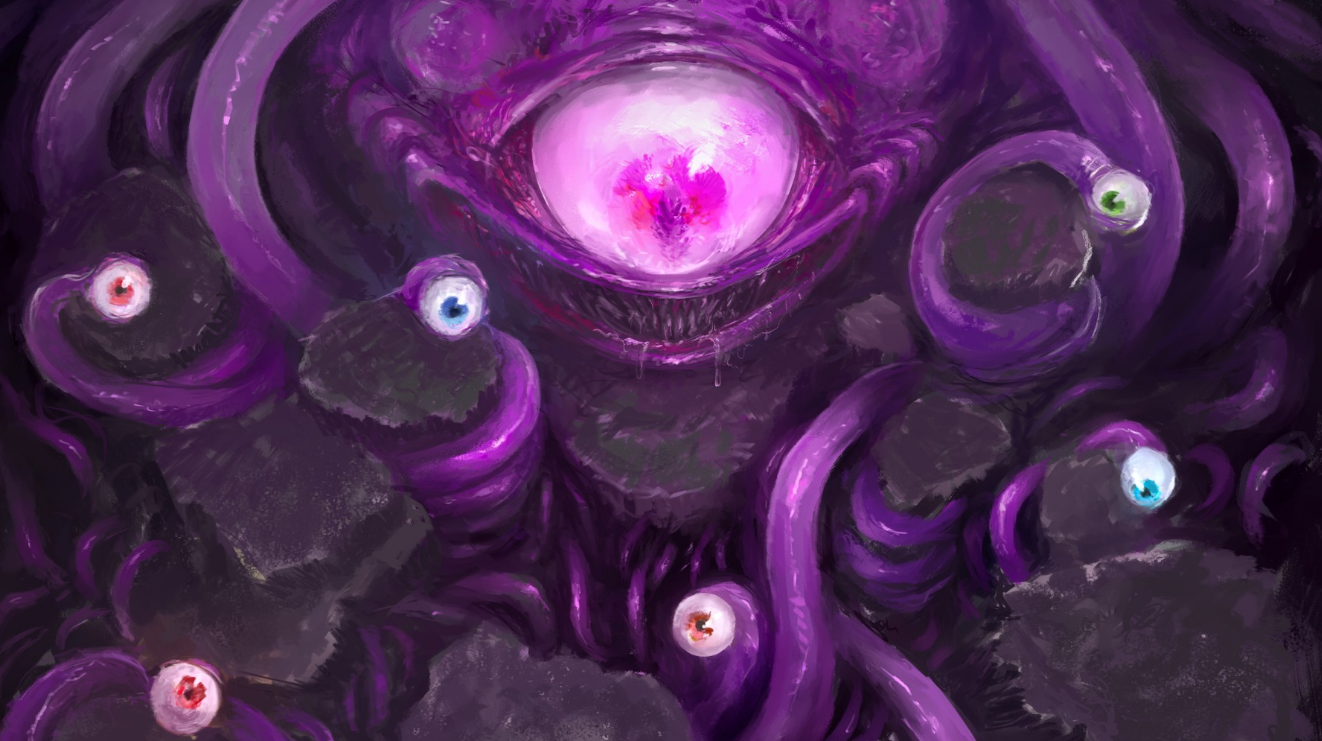
Whether it’s deep in a subterranean cavern or another eldritch plane altogether, this Lair of the Many-Eyed God sets the stage for an unforgettable battle against a gargantuan beholder boss.
This map depicts a chaotic, otherworldly space filled with floating platforms entwined by writhing tentacles. The sheer size of this creature is overwhelming; countless eyestalks frame a giant central eye, gleaming with malevolent intelligence. The verticality of the platforms and scale of the boss’s body make this lair absolutely treacherous, demanding both strategy and skill from your players.
Suggested Mechanics
- Gravitational Surge. A beholder—paranoid, tyrannical, reclusive creatures driven by their sense of superiority—has absolute dominion over its lair, and it should show. The Many-Eyed God can alter the gravitational pull within its lair, causing the floating platforms to shift, rise, or plummet at its will—forcing your players to make saves and constantly adapt to an unstable battlefield where every new turn could lead to a deadly fall or crushing impact.
- Ray Barrage. Beholders might typically unleash a single eye ray as a Legendary Action, but what’s that restriction to a god? The Many-Eyed God can fire multiple eye rays simultaneously from its various eyestalks, while the central eye might channel a devastating, amplified beam that forces your players to seek or create cover.
- Eldritch Tentacles. The tentacles wrapped around the floating platforms might separate from the boss in the turn order, acting independently to grapple and restrain players, or even throw them off the platforms. The tentacles could also have different effects, à la a beholder’s quintessential ray beams—such as draining their life, inflicting poison, or applying status conditions.
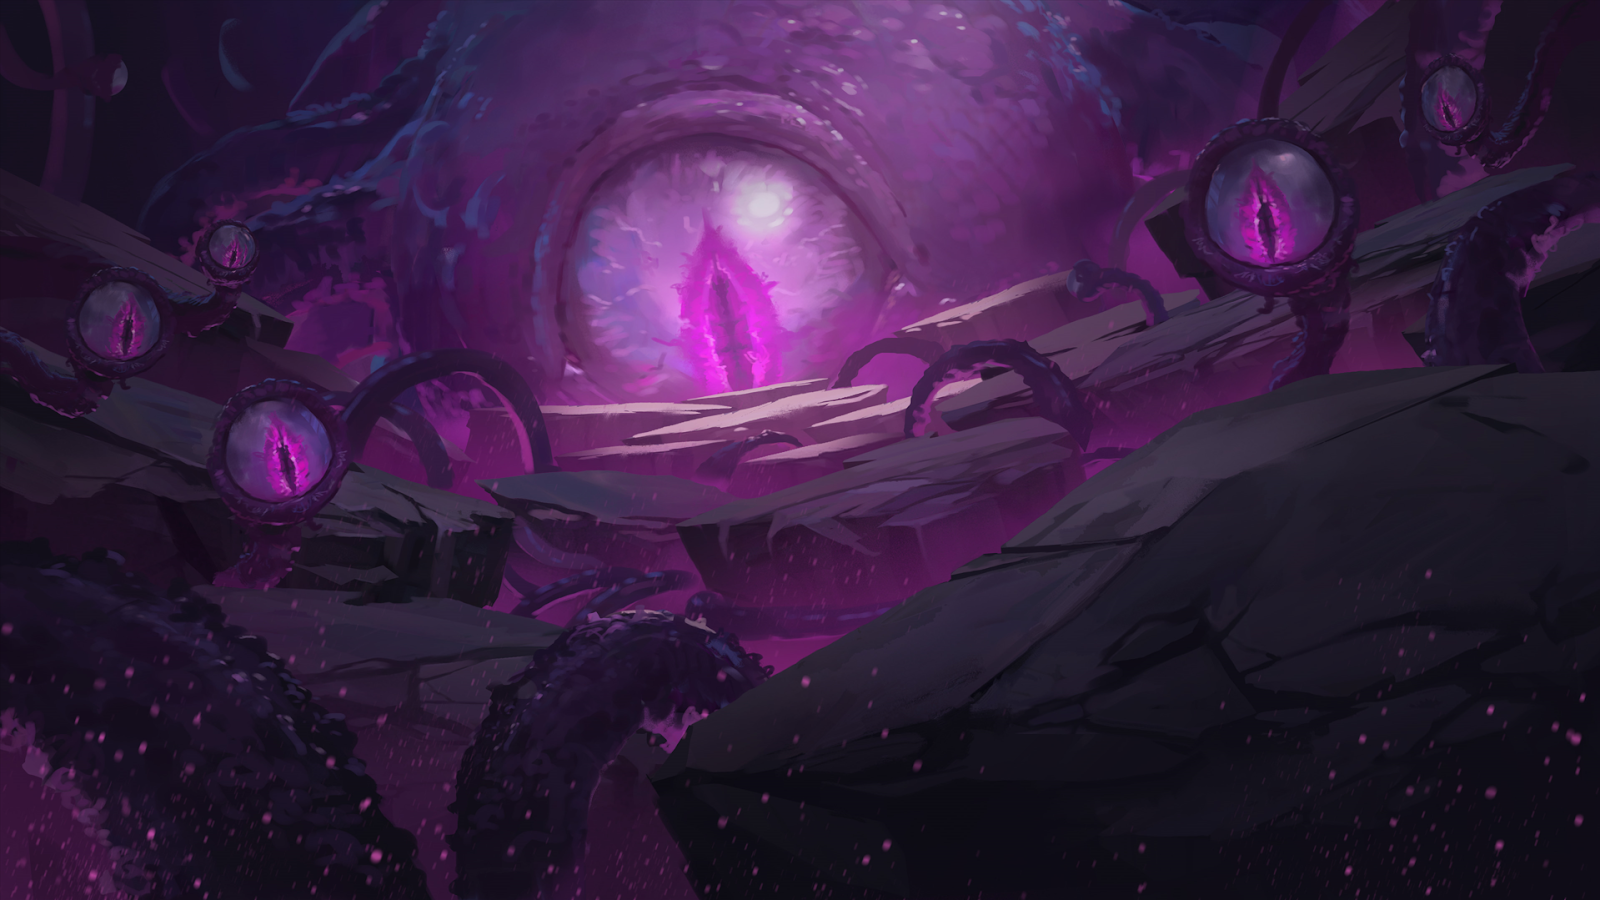
This map comes with a Scene—a gorgeous, hand-drawn illustration of the map from a player’s point of view. Immerse your party in this horrifying eldritch cavern with vivid visuals that bring to life the atmosphere and tension of facing an ancient god. Check it out here!
9. Temple of the Couatl — Boss Room
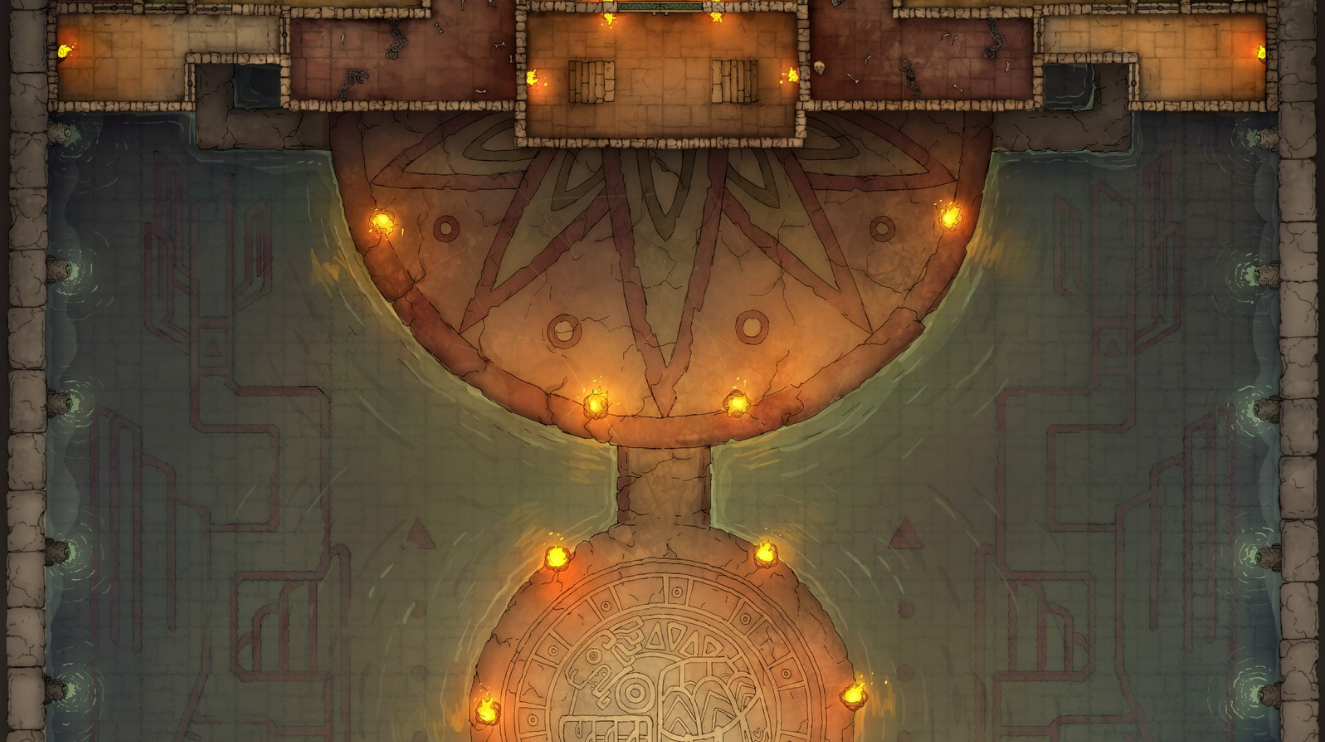
Hidden deep within a lush, ancient jungle, this Temple of the Couatl map stands amidst the verdant greenery as a forgotten sanctuary of divine magic.
This map leads from the shadowy corridors of an underground dungeon (for which we have a fully detailed, 4-level dungeon crawl map available right here!) into a wide, open circular platform set in the middle of a vast pool of water. The platform is adorned with tribal runes, surrounded by flickering torches—a seemingly once-revered site for a long-lost civilization, now standing vigil to the ancient powers that still linger within its hallowed grounds.
Suggested Mechanics
- Sacred Runes. The runes engraved on the platform can be activated by the Couatl to create barriers, heal itself, or summon other celestial creatures to aid in its battle. Players might need to figure out how to disable the runes—perhaps through foreshadowing throughout the adventure—or destroy them to weaken the celestial creature.
- Elemental Empowerment. If your party is heavy on the magic side, consider infusing the temple with elemental power. Each round, the Couatl can draw upon this energy to gain resistance to one type of elemental damage and channel that element into its bite attack, changing its damage type or adding an extra damage die.
- Visions of Demise. The Couatl possesses prophetic abilities and is able to foresee its own death. During the battle, it may project haunting visions onto your party, showing them unsettling scenes of their possible futures. These visions could be used to foreshadow or hint at events yet to come in your campaign, or disorient the players by forcing them to confront their biggest fears—be it failure, death, or something else deeply personal.
10. Wizard Prison
Last but certainly not least, this Wizard Prison map marks the fourth installment in a series of mind-blowing maps exploring strange, eldritch alternate dimensions.
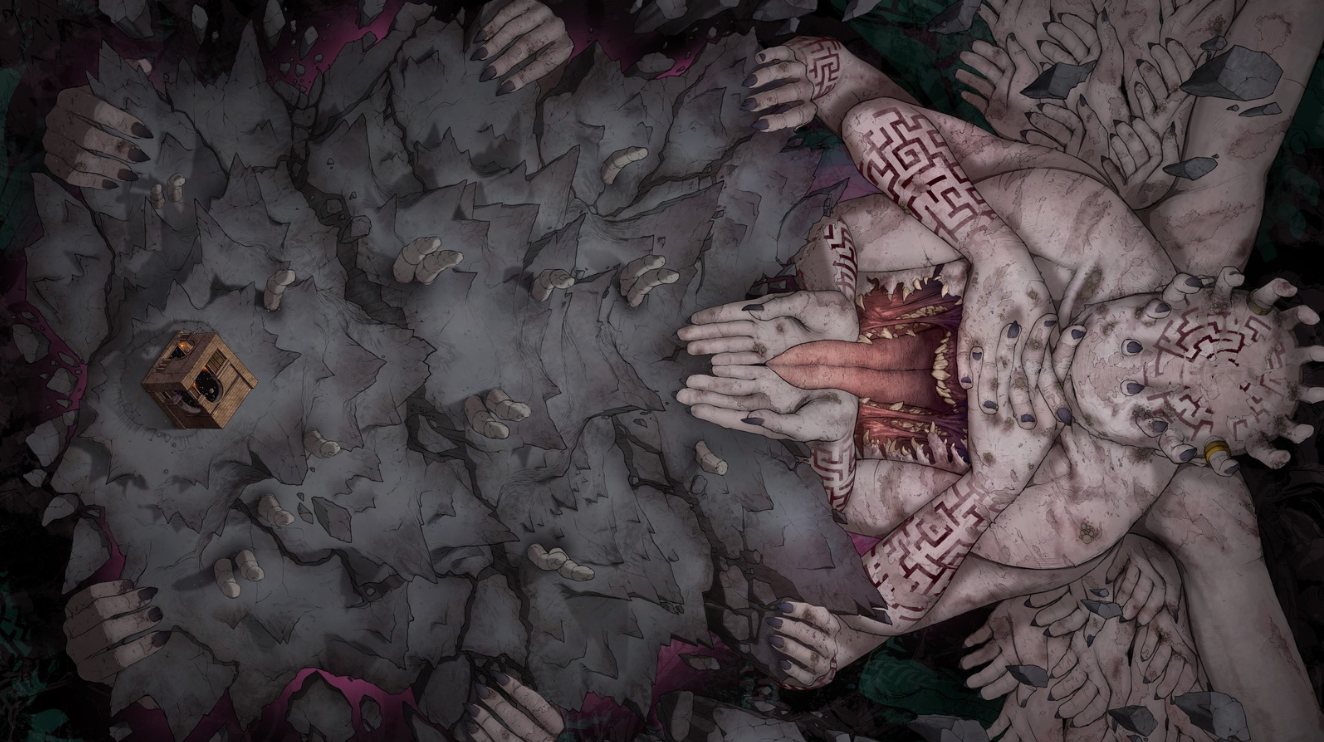
A floating island sits, suspended in a void, its jagged terrain leading to a grotesque figure of a gargantuan angel. This nightmarish creature has a gaping mouth in its chest and numerous arms extending in all directions—some supporting the island itself, others forming the patchwork of eerie wings looming over the landscape. Two hands form a path from the ground towards the chest, as though beckoning them into the maw of the beast.
The stark imagery of this map lends itself to infinite chilling interpretations! Whether the players are, as the map's name suggests, facing a malevolent being trapped in this dimension or confronting the angelic monstrosity itself, the map's visual grandeur and horror will stick with them forever.
Suggested Mechanics
- Hands of Fate. Whether the angel is the boss or not, it would be an unforgivable waste not to utilize it in the battle. The creature’s numerous hands can reach to grasp at the players, pulling a player towards its mouth. As the battle progresses, the angel may become more active, slamming its hands into the ground to create shockwaves or separating the party with its massive wings.
- Devourer of Souls. Players that are unable to escape its grasping hands—or are lured in by its whispers—become trapped in a pocket dimension, where they must face projections of their past sins or failures. These could be twisted versions of allies or former foes, forcing the player to confront their own guilt and regrets. Consider using the maps in the Wizard Prison series to supplement this mechanic!
- Eldritch Judgment. The angel embodies an eldritch and hideous effigy of divine justice, and can pass judgment on players at key points of the battle. Players must make a Charisma saving throw as the angel casts judgment upon them, determining whether their actions throughout the campaign were “worthy”. Those who fail to meet the standards of this unforgiving, ancient being may suffer negative status conditions, curses, or even permanent madness.
Start Your Adventure With a FREE Asset Pack!
Keep up to date with the latest from Czepeku, sign up to our mailing list now and receive an introductory goodie bag of fantasy and sci-fi maps, scene, and tokens.